To create connection Sitecore Rocks with Sitecore Instance
First you should have Sitecore Rocks tool/extension installed in your Visual Studio, if not installed then please check with my previous blog that How to Install Sitecore Rocks with Visual Studio
After the Successfully Installation with Sitecore Rocks, now it's time to create connection with Sitecore instance.
1. On the top of the Solution Sitecore Tab is getting displayed click on that tab and select "New Connection"


First you should have Sitecore Rocks tool/extension installed in your Visual Studio, if not installed then please check with my previous blog that How to Install Sitecore Rocks with Visual Studio
After the Successfully Installation with Sitecore Rocks, now it's time to create connection with Sitecore instance.

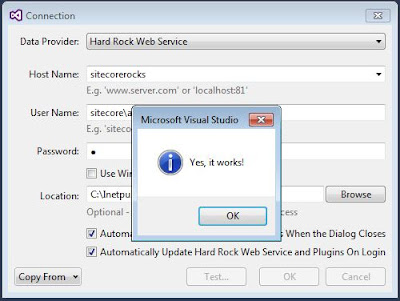
2. Fill the Host Name, Sitecore Connection Credential and wwwroot sitecore instance path these three fields are required to create connection and that is required for the fiirst time.

3. After this test that connection is created or not? And if connection will created then you will get "Yes It's work" success message.

4. Now click OK twice and after this select Sitecore Explorer.

@Note: One important thing is always scope to the project's database where you are going to work. Like for development most of the time will work on the master database

You can also scope to the content/rendering/template level as per your requirements, it will reduce the chance of getting mistake.
No comments:
Post a Comment