In previous post, we worked on creation of Tenant and Site. Now it's time to create pages using SXA Features, For that first here we are referencing sample static site, having source code.
Let's start implementation with Sitecore SXA using provided static site. First unzip the project by downloading source code which provided above and after this make zip of image directories and now come to /sitecore/media library/Project/demosite1 upload as advanced and select zip image directories
After successfully uploaded images, it's time to start creating pages using SXA. and below is the static page as reference which we are going to create using SXA
Here we see and know that header and footer will be repeating on all the pages. So first we will work on master components ( i mean Header and Footer) using SXA Partial Design Feature
And before implementing Partial Design,
let's discuss
What is partial design?
"Partial design in SXA mean collection of renderings, which is used to create master component (Header, Footer, Link list)"
When to use Partial design?
"When feel a set of renderings are getting repeated on pages, then use partial design - Create Once Use As Many"
Now Let's create Partial designs (Header, Footer) for our Site, and Remember after each steps don't forgot to save from left top on Experience Editor view.
for that first goto location
/sitecore/content/demosite1/mydemosite/Presentation/Partial Designs
Let's start implementation with Sitecore SXA using provided static site. First unzip the project by downloading source code which provided above and after this make zip of image directories and now come to /sitecore/media library/Project/demosite1 upload as advanced and select zip image directories
Here we see and know that header and footer will be repeating on all the pages. So first we will work on master components ( i mean Header and Footer) using SXA Partial Design Feature
And before implementing Partial Design,
let's discuss
What is partial design?
"Partial design in SXA mean collection of renderings, which is used to create master component (Header, Footer, Link list)"
When to use Partial design?
"When feel a set of renderings are getting repeated on pages, then use partial design - Create Once Use As Many"
Now Let's create Partial designs (Header, Footer) for our Site, and Remember after each steps don't forgot to save from left top on Experience Editor view.
for that first goto location
/sitecore/content/demosite1/mydemosite/Presentation/Partial Designs
once partial designs for Header and Footer created, open partial design item- PartialHeader using experience editor and start adding components in Header Section
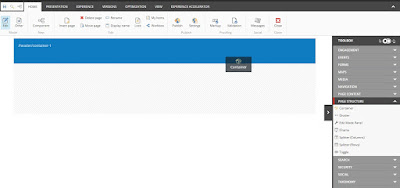
Follow steps- First drag Page Structure - Container component to the Header Section
- Now drag Page Structure - Splitter (Rows) after adding container to the Header Section and from the properties of Splitter (Rows) component and reduce as 1 (means we need here only one row under the header section) by clicking on minus symbol
- After this will drag Page Structure - Splitter (Columns) component and open component properties and increase columns as 3 ( here we need three columns with ratio 2-6-4, 2 for logo and 6 for primary navigation and 4 for social links)
- Now in the first column drag Media- Image (Reusable) component (for logo image)
Till now we are done with structuring Partial Design for Header, and added Site-Logo.In next blog will continue with adding navigation, social links to complete PartialHeader and also will create PartialFooter ...


No comments:
Post a Comment